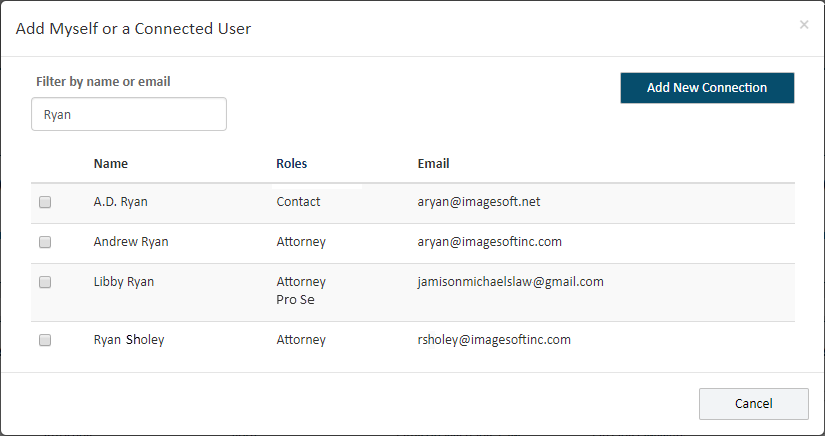
You can add yourself or a connection as a service recipient. This recipient will also be added as a contact for the case.
In the Select Service Recipients pane, click Add Myself / Connected User.
A dialog listing your connections that aren't recipients for this filing bundle is displayed. Only people that have accepted your connection request are shown.
If you or a connection has more than one TrueFiling user role, each role will be listed. Be aware, when you add a service recipient, you’re adding the person, not a specific role.

If the recipient you add has multiple roles, each role will be listed for that recipient in the Select Service Recipients section.
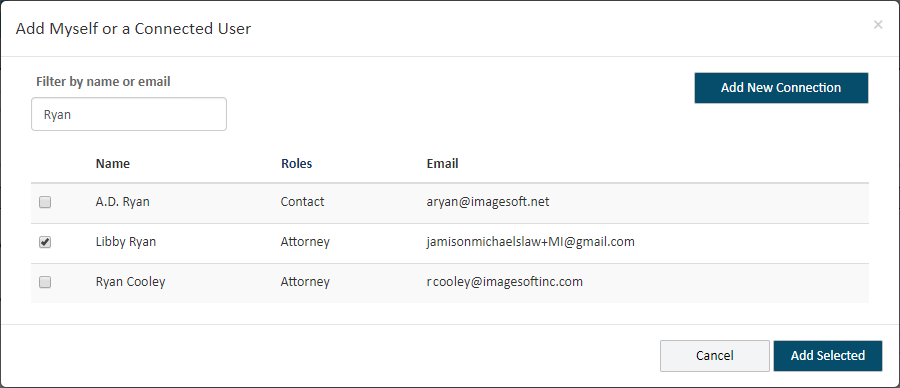
To filter the connections listed, input the name or email address of the connection you're looking for in the Filter field.
If you need to add a new connection, select the Add New Connection button. View details on this process at Add a New Connection.
Some courts may allow only TrueFiling users whose user role is Attorney to send a connection request. If you're filing in such a court, and your user role is not Attorney, the Add New Connection button is not visible.
Locate the connection to add as a recipient.
Select the checkbox beside their name.
Click Add Selected. The recipient is added.
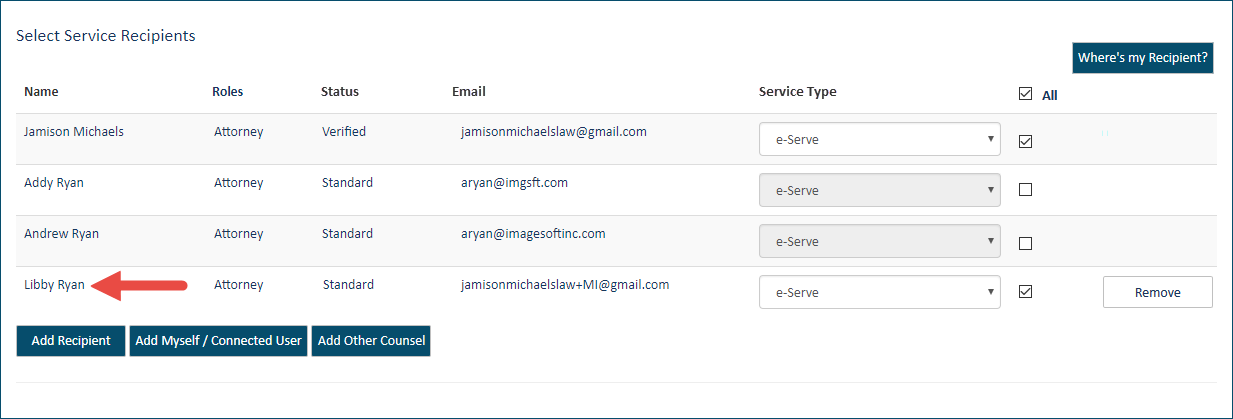
Select the Service Type.
Click the Remove button to remove the recipient, if needed. This option is available only before you submit your filing bundle to the court.
Verified Contacts
Courts configured to use Verified and Standard case contacts can be further configured such that, when a user is added as a case contact or a service recipient, and the user’s email address is in the same domain as an existing Verified case contact, that user will be added as a Verified case contact. The court can subsequently identify domains (such as gmail.com, yahoo.com) that will be excluded from this configuration.
Also, if a court is configured to use Verified and Standard contacts AND is also configured to submit a verification request to the Clerk when a case contact or service recipient is initially added as a Standard contact, this dialog is displayed when you select Add Selected:
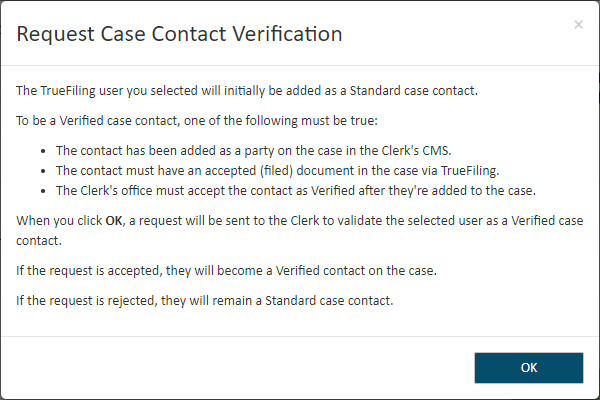
When you click OK, a request is sent to the Clerk’s office to verify the contact. The dialog will close, and the contact is added to the case as a Standard contact.
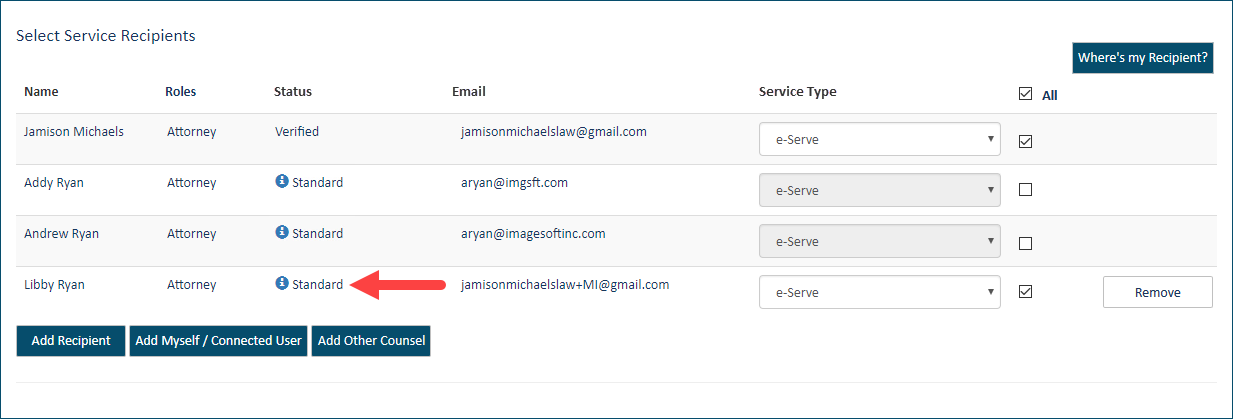
If the Clerk accepts the verification request, the recipient will be classified as a Verified contact. Otherwise, the recipient will remain a Standard contact.
See Verified and Standard Case Contacts for more information on Verified contacts.
To continue the filing process:
Submit your filing bundle to the court