 case
contacts, you can upload the filing documents and
select your service recipients.
case
contacts, you can upload the filing documents and
select your service recipients.Once you've located your case and added any required
 case
contacts, you can upload the filing documents and
select your service recipients.
Select File under Main Pages in the navigation pane.

Select the Court you'll file in.
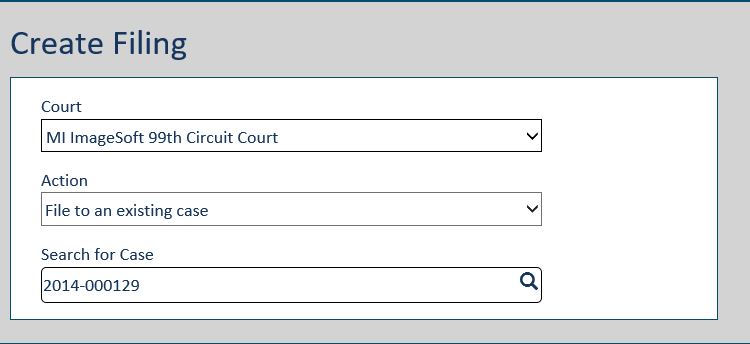
Select File to an existing case from the Action field drop-down list.
Input part or all of the Case Number or Case Title in the Search for Case field.
A court can configure their own criteria requirements for the Search field. Therefore, your search may not be based on case number or case title.
Click the Search icon.
Search Tips:
If more than 5 cases are returned, refine your search by entering more detailed information.
You can also select the click here link in the search results pane to be directed to the Case Search page where you can perform a more advanced search by adding a date range to your search criteria.
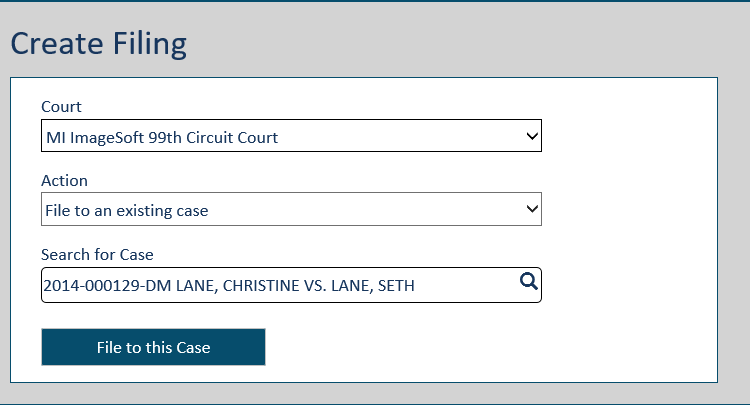
Once you locate your case in the search results, click the Case Number to launch the Case Details page. There, you can select the File to this Case button and proceed to the File and Upload panes where you can select your filer and upload your filing documents, respectively.
Select the case from the list displayed.
If the case is not available for eFiling, this message is displayed…
Case not available for eFiling. No Filing Types available.
… and the File to this Case button is not available.
Click the File to this Case button. The File pane is displayed.
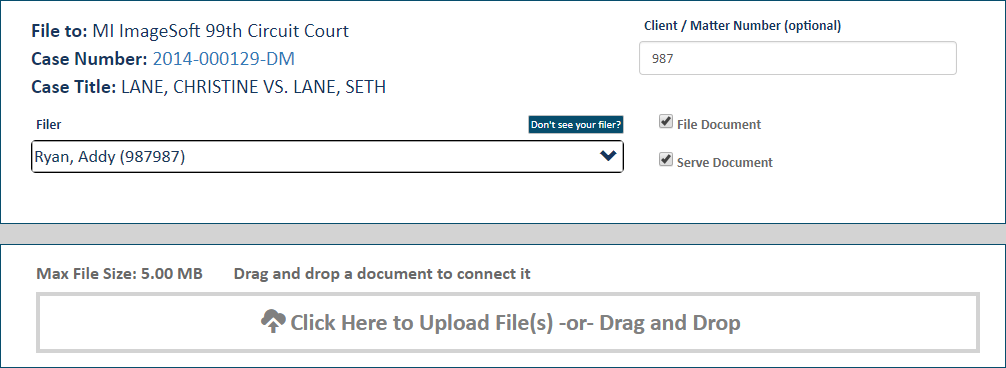
Click the arrow in the Filer field to display a list of possible filers. This person will be listed on the History page as the Filer.
If you have an  assigned
user role, your name will be listed.
The list is also populated with eligible filers you're connected to. Note that, if you file on behalf of a connection, you are considered the submitter, and the connection is considered the filer. If you submit on a connection's behalf, you are listed on the History page as the Submitter.
If the filer you want isn't listed, click Don't see your filer.
Select the Filer.
If the selected filer is not already a case contact for the case, they will be automatically added as one once the filing is submitted.
If the court you’re filing in is configured to use Verified and Standard contacts, and the selected filer is not a case contact, they will be added as a service recipient and selected for service by default. The filer is identified as a Standard contact.
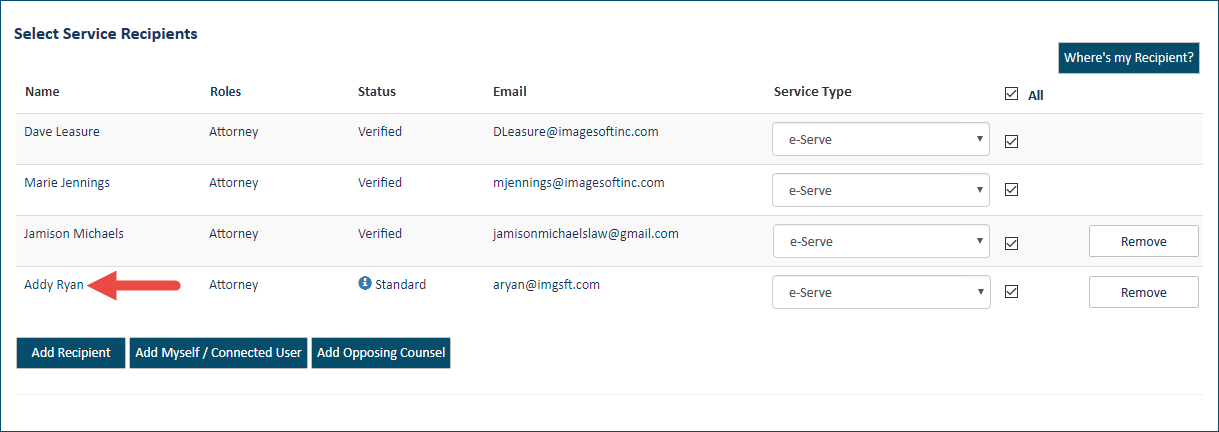
If the Clerk files the filing submitted to the court, the filer will become a Verified case contact. Otherwise, they will remain a Standard contact.
Input a Client/Matter Number, if one is required.
To file the document with the court, ensure File Document is selected.
IMPORTANT: If you de-select this option, your filing will NOT be sent to the court, and a confirmation dialog is displayed.
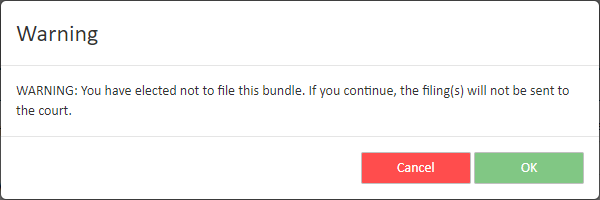
Click OK to continue without filing the document. If you click Cancel, the File Document option is re-selected.
If you want to serve your filings to parties of interest in the case, select Serve Document. If you select this option, you'll need to specify the service recipients and the servicing method.
To continue the filing process: